When winter bites hard during the Ice Age, your feet are your lifeline. Keeping your footwear in top shape isn’t just about comfort; it’s about survival. This means daily vigilance, smart material use, and understanding how to coax maximum life out of every pair of boots.
The Daily Stitch: A Footwear’s Best Friend
Think of your footwear like a trusty companion. You wouldn’t let a good friend fall apart without a little attention, and your boots deserve the same. The relentless cold and rough terrain of an Ice Age winter can be brutal, and even the smallest tear or loosest seam can turn into a serious problem faster than you can say “mammoth.” Making a quick inspection part of your routine is non-negotiable.
Morning Check-Up: What to Look For
Before you even think about stepping out into the biting wind, take a moment to give your boots a thorough once-over. This isn’t a deep dive, just a quick visual and tactile assessment. Run your fingers along the seams, feel for any loose threads or fraying. Check the stitching, especially where the sole meets the upper. Are any sections of sinew looking thin, brittle, or starting to pull away? Pay attention to the lashing points where straps connect to the boot – these are high-stress areas.
The Sinew Shuffle: Keeping Stitches Strong
The primary binding material for most Ice Age footwear is sinew, either from large game animals like bison or reindeer. Over time, and especially when exposed to moisture and then freezing, sinew can dry out, become brittle, and lose its tensile strength. It can also fray, creating weak points. Your daily task involves identifying any sinew that looks compromised. This might mean looking for a duller, rougher texture, or even seeing individual fibers starting to separate. If a stitch looks questionable, it’s better to reinforce it or re-stitch it before it breaks completely.
Lashings and Looseness: The Art of Re-Tying
Many boots rely on a system of lashings to secure different parts, like straps to the sole or the upper to a frame. These can loosen with wear, especially if the material they’re made from (often leather thongs or more sinew) gets damp and then contracts when it dries or freezes. A loose lashing can cause uneven wear, put extra stress on other parts of the boot, or even allow a sole to detach. Get into the habit of giving all visible lashings a firm tug. If any feel slack, take a moment to re-tie them snugly. It’s a small effort that pays dividends in preventing bigger headaches later.
During the harsh winters of the Ice Age, repairing footwear was essential for survival, as proper insulation and protection from the elements were crucial for mobility and safety. An interesting article that explores the broader context of resource management during ancient times, including how societies adapted their rationing systems to cope with harsh conditions, can be found here: Rationing Systems in the Ancient World. This resource provides insights into how ancient peoples, much like those in the Ice Age, had to innovate and make the most of their available materials to endure extreme climates.
Fat is Your Friend: Re-Treating Hide for Durability
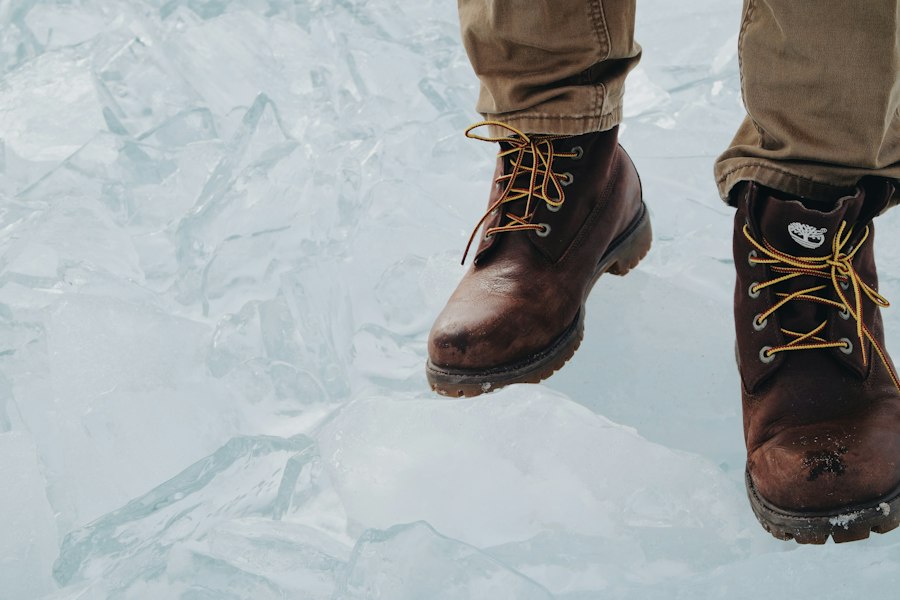
Leather, whether it’s made from reindeer hide, sealskin, or other animal pelts, is a fantastic material for footwear. It’s relatively tough, offers some insulation, and can be surprisingly water-resistant when treated properly. However, it’s also a natural material that dries out, cracks, and becomes brittle if left unattended, especially in the harsh, dry conditions of an Ice Age winter. Regular re-treatment with animal fat or oil is absolutely crucial.
The Why of Fat: More Than Just Lubrication
Animal fats and oils do more than just make your boots feel smooth. They actually penetrate the pores of the hide, filling them in and preventing moisture from getting in too easily. This is especially important in a slushy, wet snow environment. The oils also help to keep the collagen fibers within the leather flexible. Think of it like conditioning your skin; without it, your skin gets dry and cracks. The same principle applies to leather. By keeping the leather supple, you significantly reduce the risk of it cracking or splitting, which can be catastrophic when it’s minus thirty degrees.
Application Techniques: Getting it Right
The type of fat or oil you use will depend on what’s available. Rendered animal fat from bison, deer, or even fatty fish can work. Whale blubber oil might also be an option in coastal areas. The key is to apply it generously. Ideally, you want to work the fat into the leather when it’s at a moderate temperature. If your boots are cold, gently warming them (without direct heat, which we’ll cover later) can help the fat absorb better. Use your hands or a piece of bone or hide to rub the fat all over the exterior of the boot, paying special attention to seams, stress points, and any areas that look dry. Don’t forget the inside if it’s also made of hide. A good application might leave a slight sheen, but it shouldn’t feel greasy and slick.
Frequency is Key: Don’t Wait for the Cracks
How often do you need to do this? It’s best to err on the side of caution. If you’re wearing your boots daily, and especially if you’re encountering wet conditions, re-treating them every few days or even daily might be necessary. You’ll get a feel for it – if the leather starts to feel stiff or looks lighter in color, it’s time for another application. It’s much easier to prevent cracks than to repair them, especially when you’re trying to do it on the fly in sub-zero temperatures.
The Fluff Factor: Preserving Your Insulation

Inside your sturdy hide boots, there’s likely a layer of insulating material. This isn’t just passive padding; it’s actively working to trap warm air close to your feet, keeping them from freezing. Keeping this stuffing in good condition is just as vital as the outer shell of your boots. Dried grass, moss, or even finely scraped animal fur can be used, and their effectiveness hinges on them being dry and fluffy.
The Purpose of Stuffing: More Than Just Comfort
The primary role of this internal stuffing is to create a barrier of insulating air pockets. When this material is compressed or damp, its ability to trap air is severely compromised. Think about wearing a thin, damp sock versus a thick, dry wool sock – the difference in warmth is immense. The stuffing in your boots functions in a similar way. It needs to be “lofted” – meaning it should be light and airy, with plenty of space between the fibers for air to be trapped.
Re-Packing and Replenishing: A Lifesaving Task
Over time, the stuffing inside your boots can become compressed from wear. It can also absorb moisture from sweat, or if your boots get wet from the outside. Your regular footwear maintenance should include checking this inner layer. If it feels flat or damp, it needs attention. You might need to pull out the old stuffing, dry it thoroughly in a safe place (again, away from direct heat), and then re-pack it. Sometimes, you might need to replace it entirely if it’s become soiled or degraded.
Sourcing and Preparing Your Stuffing: Always Be Prepared
Having a good supply of dry stuffing material is a smart move. When you’re out and about, keep an eye out for dry grasses that haven’t been buried too deeply by snow, or dry moss from sheltered, rocky areas. If you harvest moss, try to pick it when it’s dry and brush off any excess dirt or debris. For grass, ensure it’s thoroughly dry before packing it into your boots. If you have access to animal hides, scraping the fine fur from them can also provide excellent insulation. The goal is to keep this inner layer dry and fluffy at all times.
The Fire-Free Zone: Drying Your Footwear Safely
This is a critical point, and one where mistakes can be costly. When your boots are wet, the temptation to shove them close to the fire to dry them quickly is almost overwhelming. Resist it with all your might. Direct heat is the enemy of hide footwear. It will inevitably lead to shrinkage, hardening, and ultimately, splitting and cracking. Safe drying is slow drying.
The Danger of Direct Heat: What Happens to Leather
Imagine a piece of meat placed directly on a hot grill. It sears, hardens, and if left too long, turns to charcoal. Leather, being derived from animal hide, undergoes a similar process when exposed to excessive heat. The natural oils and moisture within the hide are rapidly evaporated, causing the fibers to contract and bond in a rigid, brittle state. This makes the leather prone to tearing and breaking. Furthermore, rapid drying can cause uneven shrinkage, leading to warping and a poor fit.
Finding the Right Drying Spot: Air and Gentle Warmth
The ideal drying environment for your Ice Age winter footwear is one with moving air and moderate warmth. This could be near the entrance of your shelter, where there’s a gentle draft. If you have a fire, place your boots at a safe distance where they receive indirect warmth. Think of it like hanging laundry to dry on a breezy day – the air does the work. You can also hang them up so that air circulates around them. If you can elevate them off a damp floor, even better.
The Speed vs. Integrity Trade-Off: Patience Pays Off
It’s a trade-off, for sure. Drying boots by a roaring fire might take an hour or two, while air drying can take much longer, perhaps a day or more depending on how wet they are and the ambient conditions. However, the integrity of your boots is paramount. A pair of boots that are stiff, cracked, and falling apart is far more dangerous than a pair that takes a bit longer to dry. Prioritize the long-term survival of your footwear. If they are saturated, it might be wise to have a spare pair to wear while the primary ones dry.
During the harsh winters of the Ice Age, the need for durable footwear was paramount for survival, leading to innovative repair techniques that have intrigued historians. A fascinating article explores the various methods early humans employed to maintain their shoes, ensuring they could traverse the icy landscapes effectively. To delve deeper into this topic, you can read more about these historical practices in the article here. Understanding how our ancestors adapted their footwear not only sheds light on their daily lives but also highlights the ingenuity required to thrive in such extreme conditions.
The Stitch and Patch Protocol: Repairing On the Go
| Metric | Value | Unit | Notes |
|---|---|---|---|
| Average Temperature | -20 | °C | Typical winter temperature during Ice Age |
| Footwear Material | Animal hide and sinew | N/A | Common materials used for footwear |
| Repair Frequency | Every 2 weeks | Time | Estimated interval for repairing footwear |
| Repair Time | 3 | Hours | Average time taken to repair footwear |
| Tools Used | Bone needles, flint scrapers | N/A | Typical tools for repairing footwear |
| Durability Increase | 30 | Percent | Estimated increase in footwear lifespan after repair |
| Insulation Efficiency | 75 | Percent | Effectiveness of repaired footwear in retaining heat |
Damage happens. Whether it’s a snag on a sharp rock, a tear from a thorny bush, or a strap that’s come undone, you can’t afford to ignore it. The key to effective on-the-move repairs is to have the right tools and the knowledge to use them quickly and efficiently. The sooner you address damage, the less likely it is to worsen in the unforgiving cold.
Your Mobile Repair Kit: Essential Tools
Every serious winter traveler should carry a small, well-organized repair kit. This isn’t complicated. At a minimum, you’ll need a good bone needle or a sharpened piece of bone that can be used as an awl to poke new holes. You’ll also need a supply of strong sinew, preferably kept dry and perhaps pre-twisted into usable lengths. A small, sharp flint or obsidian knife is invaluable for trimming excess material or cutting sinew. Keep these items together, perhaps in a small pouch made of hide or woven fibers, so you can find them easily when you need them.
Stitching in the Cold: Techniques for Tears and Holes
When you find a tear, the first step is to assess its severity. If it’s a simple split in the hide, you can often stitch it closed by passing your sinew through the existing holes or making new ones with your awl. For larger tears, or where a piece of material has completely detached, you might need to gather the edges and fold them over slightly before stitching, or even use a small patch of hide from your repair kit. The goal is to create a strong, secure seam that won’t let in cold air or moisture. Practice makes perfect here; the more you do it, the more adept you’ll become at creating durable stitches.
Re-Attaching the Unattached: Straps, Bindings, and Soles
Straps and bindings are critical for keeping your boots snug and functional. If a strap breaks or a lashing comes undone, address it immediately. You might be able to re-sew a broken strap using your sinew and needle. For loose soles, especially if they’re held on with pegs or extensive stitching, you’ll need to re-secure them. This might involve re-poking holes and passing sinew through, or even re-pegging if the original pegs have worked loose. If a section of the sole has completely delaminated, you might need to use a larger patch of hide or even a piece of rawhide cordage to bind it back in place. Think creatively about how to create a strong bond.
During the harsh winters of the Ice Age, repairing footwear was crucial for survival, as proper insulation and protection were necessary to withstand the extreme cold and icy conditions. An interesting article discusses the innovative methods early humans might have used to maintain their footwear and adapt to their environment. For more insights on how ancient practices can inform modern techniques, you can read about it in this related article. Understanding these historical approaches not only sheds light on our ancestors’ ingenuity but also inspires contemporary solutions for outdoor gear.
Navigating the White Expanse: Traction and Flotation
Even the best-maintained boots can struggle in deep, soft snow. This is where the concept of improvised snowshoes becomes not just a convenience, but a necessity for covering ground and conserving energy. Keeping these vital extensions of your footwear in working order is a crucial part of surviving the winter.
The Snowshoe Advantage: Why They Matter
Imagine trying to walk through waist-deep powder without any aid. You’d be expending an enormous amount of energy with every step, sinking and struggling. Snowshoes, by distributing your weight over a larger surface area, allow you to “float” on top of the snow, making travel significantly more efficient. This is vital for hunting, gathering resources, and simply moving between shelters. Without them, your travel range is severely limited, and the risk of exhaustion and hypothermia increases dramatically.
Construction and Cordage: Building Your Floatation Devices
Improvised snowshoes are typically made from flexible, green wood that can be bent into a frame without breaking. Branches of willow, birch, or other pliable trees are ideal. The frame is then strung with a strong cordage, often made from sinew or plant fibers. This cordage creates a mesh that traps the snow. The design can vary, but a basic oval or teardrop shape is common. When building, ensure the frame is sturdy and the cordage is tightly woven to prevent snow from pushing through easily.
Binding Maintenance: Keeping Them Attached
The most crucial part of using snowshoes is the binding system that attaches them to your boots. This usually involves leather thongs or sinew cords that loop through holes in the snowshoe frame and around your boot. These bindings are subject to a lot of stress and can loosen, fray, or break. Daily checks of your snowshoe bindings are essential. Make sure they are snug but not so tight that they cut off circulation. Re-tie any loosened lashings immediately, and be prepared to repair any frayed cordage with spare sinew or fibers from your kit. Losing a snowshoe in deep snow is a frustrating and potentially dangerous situation, so keep those bindings in top condition.

Life 20,000 Years Ago | When Your Ice Age Family Can’t Feed the Dog
FAQs
What materials were commonly used for repairing footwear during the Ice Age?
During the Ice Age, people primarily used natural materials for repairing footwear. Common materials included animal hides, sinew, and plant fibers. These materials were readily available and provided durability and insulation, essential for surviving harsh winter conditions.
How did Ice Age humans create footwear suitable for winter conditions?
Ice Age humans crafted footwear by using animal skins to create boots that covered the feet and lower legs. They often lined these boots with fur for added warmth and used techniques such as lacing or wrapping to secure them tightly, preventing snow and cold air from entering.
What techniques were employed to repair damaged footwear?
Repair techniques included sewing torn seams with sinew or plant fibers, patching holes with additional pieces of hide, and reinforcing worn areas with extra layers of material. These methods ensured that the footwear remained functional and protected against the elements.
Why was footwear repair important during the Ice Age?
Footwear repair was crucial during the Ice Age because proper footwear was essential for mobility, hunting, and gathering food. Damaged footwear could lead to frostbite or injury, making it vital for survival in the extreme cold and rugged terrain.
What role did community play in footwear repair during the Ice Age?
Community collaboration was significant in footwear repair, as individuals often shared skills and resources. Knowledge of repair techniques was passed down through generations, and communal efforts ensured that everyone had access to functional footwear, enhancing the group’s overall survival chances.