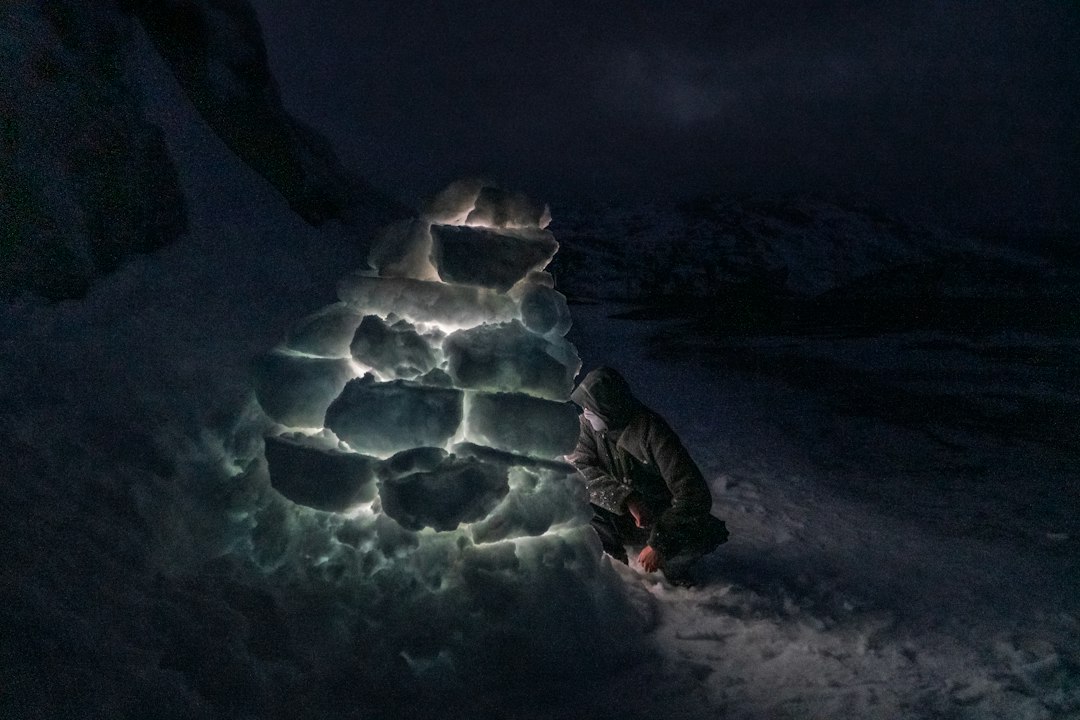
Building a winter shelter from scratch might sound daunting, but it’s less about magic and more about understanding a few core principles. The main question is usually: can I actually stay warm and safe in a homemade shelter during the cold? Yes, you absolutely can, by focusing on insulation, wind protection, and minimizing heat loss.
Finding the Right Spot: Location, Location, Location
Choosing the best place to build your shelter is probably the most critical step. It’s not just about aesthetics; it’s about physics and making the most of what nature offers. A good location can drastically reduce the effort needed to keep warm.
Natural Windbreaks
Look for existing natural features that can block the wind. This could be a dense stand of evergreen trees, a large rock formation, or even the leeward side of a hill. Wind is a major heat thief. Even a slight reduction in wind speed can make a huge difference in how warm your shelter feels and how much energy you need to expend to stay warm. Avoid open, exposed areas where the wind can relentlessly chip away at any warmth you generate. Think about where the wind usually blows in your area during winter and use that knowledge to your advantage.
Sun Exposure
While wind protection is key, don’t forget about the sun. If you can find a spot that gets direct sunlight during the day, it can provide a little extra passive heating. This is especially beneficial during shorter winter days. The south-facing side of a slope or clearing can be ideal. However, prioritize wind protection over sun exposure if you have to choose. A sunny spot that’s also a wind tunnel won’t be very effective.
Drainage and Snow Accumulation
Consider where water will go if it melts, and how snow might accumulate. You don’t want your shelter to become a basin for melting snow or rainwater. Building on a slight incline or a raised area can help with drainage. Also, think about how much snow is likely to fall and drift. You don’t want your entrance buried or the roof collapsing under the weight. Observing how snow drifts against natural features can give you clues.
If you’re interested in primitive winter shelter building and survival techniques, you might find it beneficial to explore related topics that discuss the importance of preparedness and self-sufficiency. One such article that delves into the nuances of security and protection, albeit from a different angle, is about real estate and its vulnerability to government seizure. You can read more about this intriguing subject by following this link: Is Real Estate Safe from Government Seizure?. Understanding these concepts can enhance your overall survival strategy in various scenarios.
Building Blocks: Materials and Construction Basics

Once you’ve picked your spot, it’s time to gather materials and start building. The goal is to create a barrier between you and the elements that traps your body heat. This involves a combination of insulation and structural integrity.
Insulation is King
Insulation is what keeps the heat in. Think about what materials are good at trapping air. Dry leaves, grass, moss, pine needles, and snow itself are all excellent insulators. The more air pockets you can create and trap, the better. This is why thicker walls and roofs are generally better. Even seemingly simple materials like straw or dried grass can provide significant R-value when packed densely. Modern research into materials like aerogel highlights how effective trapped air is, and we can replicate some of those principles with natural, available resources.
Structural Considerations for Cold
Primitive shelters need to be sturdy enough to withstand snow load and wind. For snow shelters, the shape is crucial. Arches and domes distribute weight evenly. For shelters built with branches and debris, a strong framework is essential. Think about how you’ll connect your structural elements. Lashing with cordage made from bark or roots is a traditional skill that is very useful. Ensuring the structure can shed snow and ice is also important to prevent collapse.
Creating a Compact Interior
Smaller spaces are easier to heat. Your body produces heat, and in a small shelter, that heat is concentrated, warming the air inside more effectively. Think about how much space you actually need to lie down and move a little. Overly large shelters, even if well-insulated, will struggle to reach a comfortable temperature without a significant heat source. This is a principle echoed in modern low-cost shelters and traditional dugouts.
Shelter Types: Digging In and Building Up
There isn’t one “right” way to build a winter shelter. Different environments and available materials lend themselves to different designs. Understanding a few common types can help you adapt to your situation.
The Snow Shelter Advantage
Snow is an incredible insulator. When packed, it traps a lot of air. A well-built snow shelter, like an igloo or a snow cave dug into a drift, can be surprisingly warm inside, even below freezing outside. The key is to create a solid structure that allows for a small entrance and, importantly, a vent. Without a vent, you risk carbon monoxide buildup from any fire or your own breathing, and moisture can condense and freeze. Snow shelters also benefit from a “cold well” – a lower entrance that traps warmer air inside. Archaeological evidence points to complex, multi-chambered snow shelters used by ancient peoples for prolonged stays.
Dugouts and Semi-Subterranean Dwellings
These shelters take advantage of the earth’s thermal mass. Digging into the ground or building into a hillside uses the stable temperature of the earth to buffer against extreme surface temperatures. Even a shallow dugout with a roof of branches and debris can be much warmer than an above-ground structure. Traditional houses in many cultures, like Slavic izbas or ancient pit houses, were semi-subterranean for this very reason. They provided excellent insulation and wind protection. Building one requires significant effort but offers superior thermal performance.
Debris Huts and Lean-Tos
For more immediate needs, a debris hut is a relatively simple option. The idea is to create a thick mound of insulating material (leaves, pine needles, moss) over a sturdy frame. The entrance should be small and sealable. A lean-to, while offering less protection, can be improved by building a thick back wall of debris or snow to block wind and reflect heat. The emphasis here is on creating a dense layer of insulation around you. Modern bushcraft emphasizes sealing the low entrance of these shelters to trap warm air effectively.
Sod Houses and Earth-Covered Structures
Sod houses, like those historically built on the Great Plains or by Inuit peoples (sod houses or igluvijaq), utilize the insulating properties of earth. Thick walls of packed sod or earth provide excellent thermal mass and wind resistance. Modern iterations might involve earthbag construction or straw-bale building, demonstrating how these low-tech principles can be adapted. These structures are labor-intensive but offer exceptional warmth and durability with minimal fuel consumption, often relying on insulated earth beds (kang) for even greater efficiency.
Making it Livable: Comfort and Safety Features
Once the basic structure is up, a few added features can turn a functional shelter into a truly livable space, especially if you plan to spend more than a few hours in it.
Elevating Your Bed
Sleeping directly on the ground, even inside a shelter, will leach your body heat away quickly. The ground is cold. Building a raised bed or platform out of branches, logs, or even a thick layer of insulating material will make a huge difference. This elevates you into the warmer air pocket and away from the cold ground. Think of it like sleeping on a thick mattress rather than the floor. This is a fundamental principle in primitive camping that’s often overlooked by beginners.
Sealing Drafts and Managing Ventilation
The enemy of a warm shelter is drafts. Pay close attention to where the walls meet the ground, where the roof meets the walls, and especially the entrance. Use extra debris, snow, or even strips of fabric (if you have them) to seal any gaps. However, it’s crucial to remember ventilation. Even without a fire, your own breathing produces moisture and carbon dioxide. You need a way for fresh air to enter and stale air to exit. A small opening at the top for outgoing air and a slightly lower entrance for incoming air is a common strategy. If you are using a fire, ventilation becomes absolutely critical to prevent carbon monoxide poisoning.
Interior Refinements
Consider how you’ll organize your space. A small, flat area for sleeping is paramount. If you have room, a small area to store gear can keep things from getting buried or wet. If you’re using a fire, consider how to safely incorporate it, perhaps with a reflective wall behind it (made of rocks or even a salvaged piece of metal if available) to direct heat into the shelter. Modern research into emergency shelters sometimes looks at lightweight, origami-inspired structures that can be rapidly deployed and offer excellent thermal performance, hinting at the efficiency of well-designed small volumes.
When exploring the essential skills of primitive winter shelter building and survival, it’s fascinating to consider how these techniques can be applied in various survival scenarios. For those interested in understanding the broader implications of survival strategies, you might find it insightful to read about economic stabilization measures that can support communities during challenging times. This article provides a unique perspective on resilience, which can be just as important in survival situations. You can check it out here: economic stabilization measures.
Beyond the Basics: Advanced Concepts and Considerations
| Metric | Description | Typical Value / Range | Notes |
|---|---|---|---|
| Insulation R-Value | Measure of thermal resistance of shelter materials | 3 to 10 (higher is better) | Natural materials like leaves, pine boughs, and snow can increase insulation |
| Construction Time | Time required to build a basic primitive winter shelter | 2 to 6 hours | Depends on skill level and available materials |
| Survival Temperature Range | Temperature range in which a primitive shelter can maintain survivable conditions | -20°C to 5°C (-4°F to 41°F) | With proper insulation and wind protection |
| Wind Protection Efficiency | Percentage reduction in wind chill inside shelter | 70% to 90% | Depends on shelter design and sealing |
| Heat Retention Duration | Time shelter can retain heat after fire or body heat source is removed | 1 to 4 hours | Improved by insulation and compact design |
| Material Weight | Weight of materials needed for shelter construction | 10 to 30 kg (22 to 66 lbs) | Varies by shelter type and material availability |
| Maximum Occupancy | Number of people a primitive winter shelter can accommodate | 1 to 4 persons | Depends on shelter size and design |
| Fire Safety Distance | Recommended distance between fire and shelter | 3 to 5 meters (10 to 16 feet) | To prevent accidental ignition of shelter materials |
While the core principles of insulation and wind protection are essential, a deeper understanding can significantly improve your chances of survival and comfort in a primitive winter shelter.
The Role of Thermal Mass
Thermal mass refers to materials that absorb and store heat. Things like large rocks, thick earth walls, or even a small fire that heats up a stone hearth can store heat during the day and slowly release it at night. This helps to moderate temperature swings, preventing the shelter from getting too cold too quickly. Traditional homes often incorporated significant thermal mass, and even primitive shelters can benefit from this if large rocks or packed earth are available. This is a concept that modern research into durable, low-cost shelters often re-examines.
Fuel and Fire Management
If you plan to use a fire, its placement and management are critical. A fire inside a small, enclosed shelter needs meticulous ventilation to prevent dangerous gas buildup. Reflective surfaces behind the fire can significantly increase its heating efficiency. Even small, efficient wood-burning stoves in modern “hot tents” are designed with ventilation and heat reflection in mind. In a primitive shelter, a fire is a major heat source but also a significant risk if not managed properly. Understanding how much fuel you’ll need and how to collect it sustainably is also part of the planning process.
Advanced Materials in Concept
While we’re focusing on primitive building, it’s interesting to note how modern research is pushing the boundaries of shelter technology. Concepts like super-insulating solids (like aerogels), origami-inspired lightweight structures that can be quickly deployed, and wave-shaped walls for wind resistance are all aimed at creating faster, more energy-efficient shelters in harsh climates. While you won’t be 3D-printing your shelter in the wilderness, these advancements highlight the ongoing scientific interest in optimizing shelter design for extreme conditions, often drawing inspiration from successful low-tech solutions of the past.
Continuous Improvement and Learning
Building a primitive shelter is a skill that improves with practice. Each attempt will teach you something new about what works and what doesn’t in your specific environment. Don’t be discouraged if your first attempt isn’t perfect. Observe how the wind affects it, how much condensation builds up, and where the heat is escaping. These observations are invaluable for future shelter-building endeavors. The goal is to create a safe, warm refuge, and that often comes through iterative learning and adaptation.

Life 20,000 Years Ago | When Your Ice Age Family Can’t Feed the Dog
FAQs
What materials are commonly used for building primitive winter shelters?
Common materials for building primitive winter shelters include branches, leaves, grass, bark, and snow. These materials can be sourced from the surrounding environment and are used to create insulation and structural support for the shelter.
What are some effective types of primitive winter shelters?
Effective types of primitive winter shelters include the debris hut, lean-to, snow cave, and quinzhee. Each type has unique advantages, such as insulation properties and ease of construction, making them suitable for different winter survival scenarios.
How can I insulate my primitive winter shelter?
Insulation can be achieved by adding layers of natural materials such as leaves, pine needles, or grass to the walls and roof of the shelter. Additionally, creating a thick layer of snow around the shelter can provide excellent insulation against the cold.
What are the key considerations when selecting a location for a winter shelter?
When selecting a location for a winter shelter, consider factors such as proximity to water sources, protection from wind, and avoidance of low-lying areas where cold air settles. It’s also important to ensure the site is safe from potential hazards like falling branches or avalanches.
How can I maintain warmth inside a primitive winter shelter?
To maintain warmth inside a primitive winter shelter, use a small fire outside the shelter to provide heat without risking carbon monoxide buildup. Additionally, using insulating materials effectively, minimizing drafts, and wearing appropriate clothing can help retain body heat.